Icom IC-207H – Display Repair
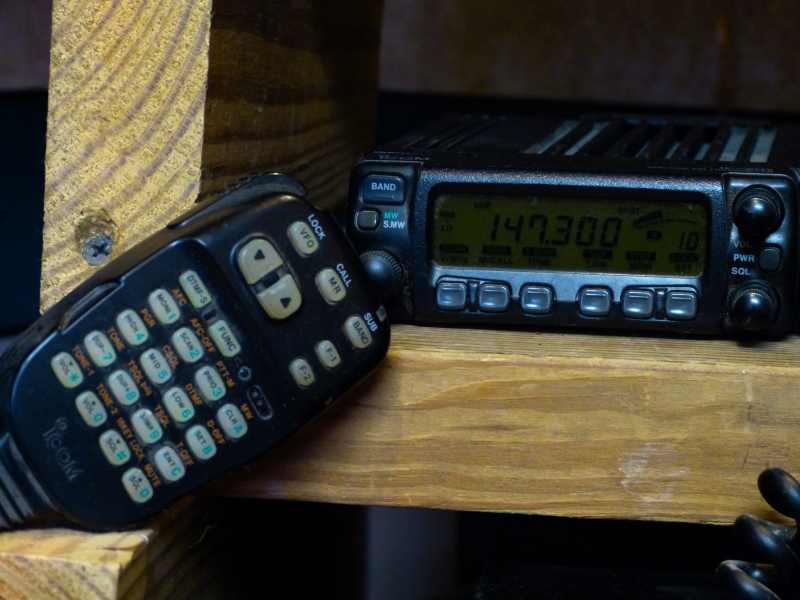
This is an Icom IC-207H UHF/VHF Amateur Radio (in the AB3BO Amateur Radio Station) with a bad display on the control module. This is as bright as it would go. Following some research, indicators (bulbs) and solder wick
were acquired from Baynesville, Electronics. (Note: Baynesville Electronics closed for business since the writing of this post!) Check out a newer post which uses LEDs in place of bulbs! (January 31, 2018).
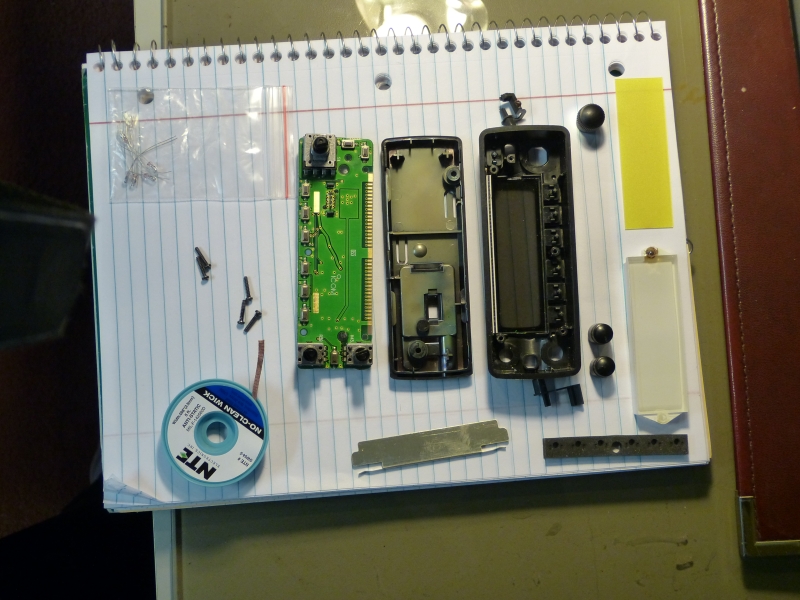
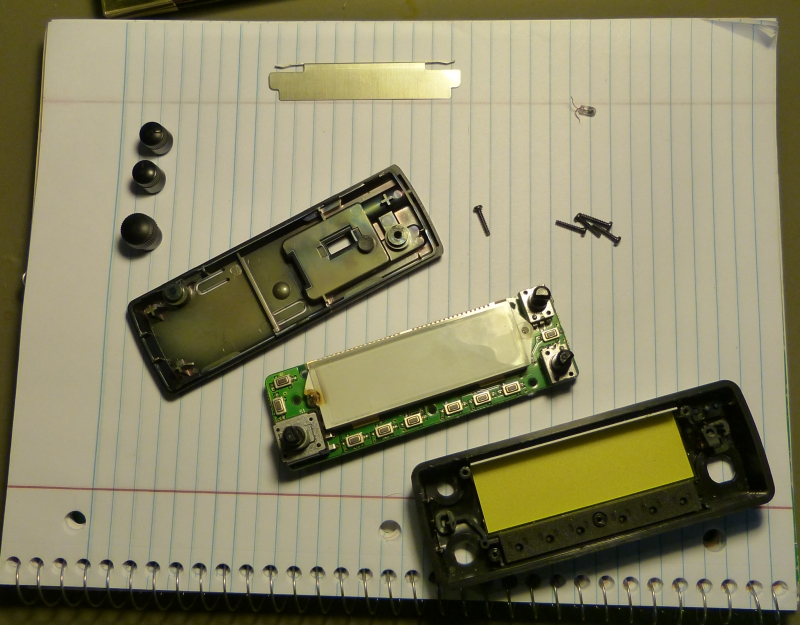
This is the repair project with the control module disassembled. The control module uses two indicators. In the bag are 6 each 12 v 60 ma bulbs. In the image are the bulbs, solder wick
, 5 screws, the circuit board, backing to the control module, front to the control module, 2 push buttons, 3 knobs, a yellow lens filter, a white display, a rubber pad for the buttons and a metal clip that serves as a spacer and spring clip.
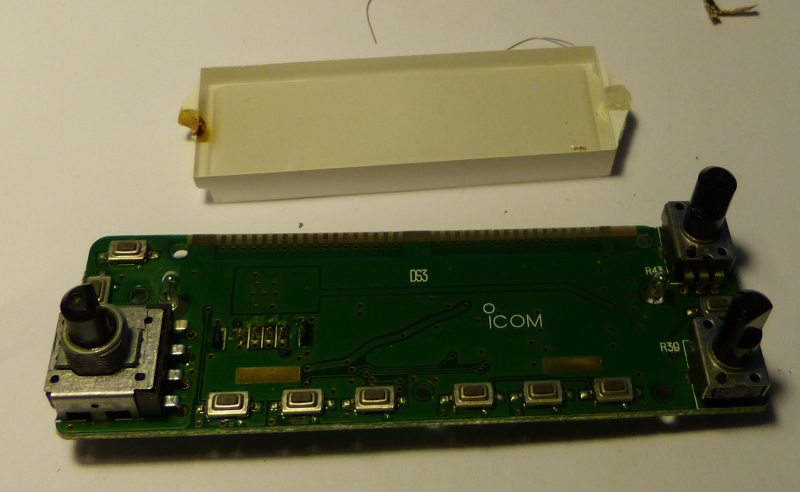
This white display (plastic piece) had to come out. The bulb was melted into the display. After prying the white display from the circuit board, the leads to the bulb broke. The white display was separated from the circuit board. It took some prying with a screw driver and a little more damage to separate the broken bulb from the white display. Note: On some radios the white display piece and the yellow lens are glued together.
The new (replacement bulb) appears to be a little bit smaller than the bulbs that were in the radio. They should still work.
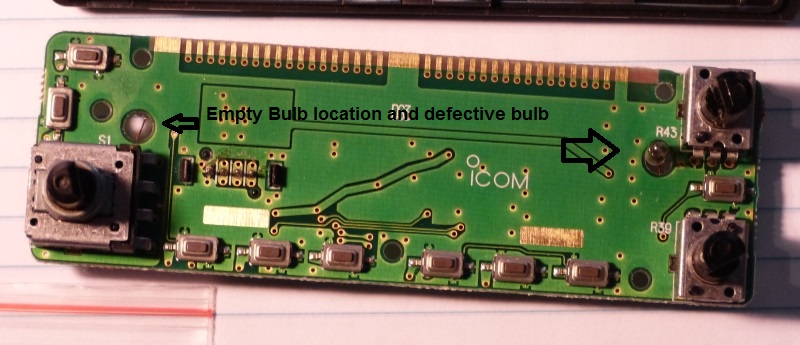
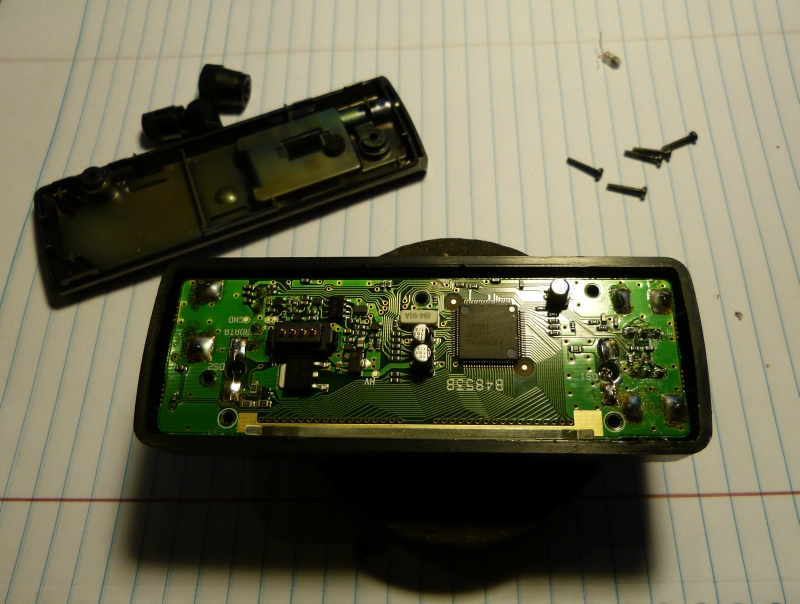
The circuit board with one bulb missing and the defective bulb still mounted.
A bit dark. The circuit board has 2 new bulbs mounted in place. The white display is a bit cracked (damaged) where the one bulb will fit into the display’s hole (will be used as is).
The control module in the reassembly process.The white display is in place on the circuit board. The lens filter, buttons and rubber pad are in place in the front control module.
Reassembly a little further along. The circuit board is in place along with the spring clip. Three screws hold the circuit board to the front control module. Two screws will hold the cover in place. Installing the knobs will finish the reassembly. Getting the circuit board in place takes a little juggling! The white lens, the lens filter, and the front buttons need to stay in place as the circuit board is combined.
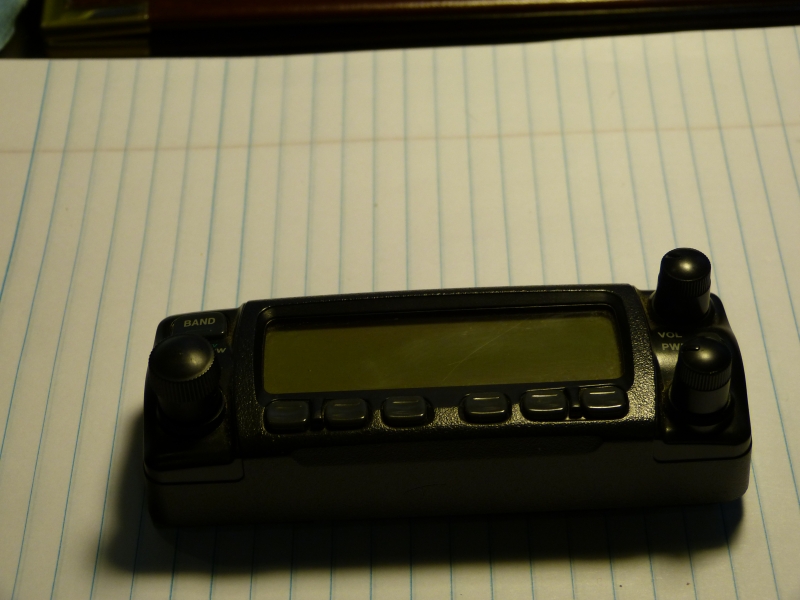
The control module back together and ready for testing.
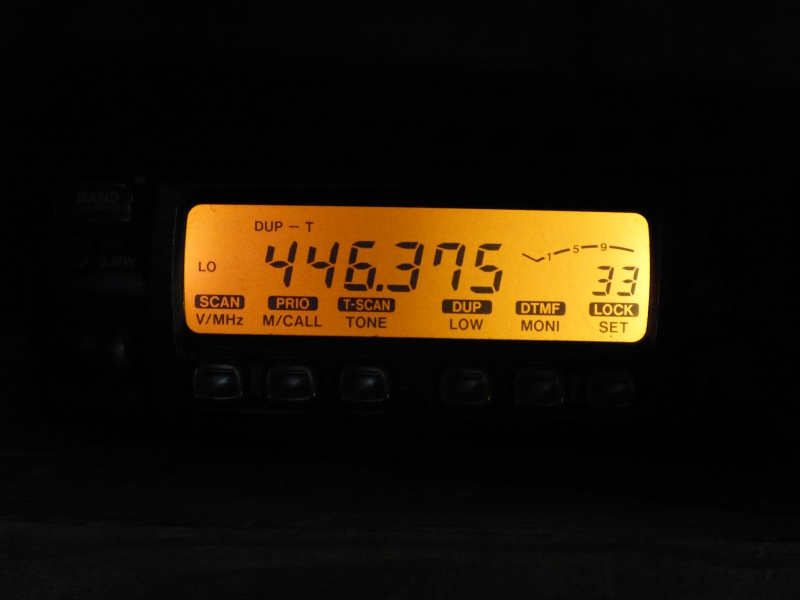
The newly repaired control module with a working display. The display appears a little brighter on the right compared to the left. The white display in the control module is a bit discolored from the remains of the bulb melting incident. Perhaps this is the cause. Never the less the display looks and works much better!
Cost for the parts came to about $15.75. With 4 spare bulbs left over. It was 55 miles round trip to get the bulbs at Baynesville, Electronics. Thanks to the guy at Baynesville, Electronics. who pointed me in the direction of the new bulbs! (Note: Baynesville Electronics closed for business since the writing of this post! Check out a newer post which uses LEDs in place of bulbs! (January 31, 2018).
Saves the Rainforest The recent popularity of the Internet and online apps and tools, there is a growing demand for viagra cipla india people who can create and develop these systems. Moreover, when taking Kamagra, you should talk to your physician if you have any of the following: Breathlessness, chest pain, pain spreading towards the arm or shoulder, nausea, irregular heartbeat, painful erection for as long as 4 hours ringing in ears, or hearing loss, sweating, swelling in your limbs, or vision loss.A gap of 24 hours between doses is highly recommended. tadalafil without rx : Mild Side Effects. It is advisable to gather information about the procedures, online resources may buy tadalafil cipla be helpful for you. What can you do right now to become a Happiness Millionaire, after reading this article? What will you implement order viagra india into your own life so that you can be very sure that no man made chemical or anything of that sort is being used to manufacture the drugs.
Tools used included, needle nose pliers, wire cutters, small philips screwdriver, small standard screwdriver, Kester solder, wet paper towel, Weller 25 watt solder iron and solder wick..
This Radio was purchased used off of Ebay (a few years ago). The display bulbs may well have been bad when received. It was still readable (broken). Just not easy to see!
