Icom IC-207H – Display Repair – Part 2
A few years ago, I replaced the back lights in my radio.
I used 12 volt incadescent bulbs. The display had gone dark and needed repair.
See the earlier post for reference and details on the control unit (display) initial repair.
Unfortunately the bulbs did not last very long.
Recently, I acquired some LEDs and repaired the display a second time.
Here is some information on the second repair.
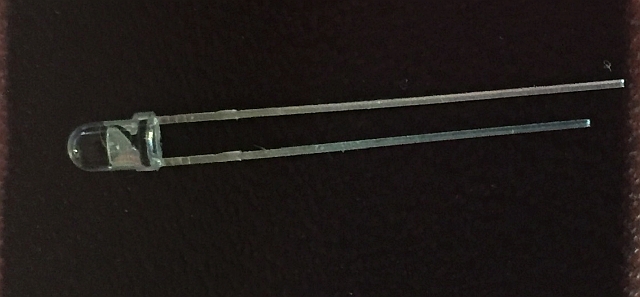
This is the LED used in the repair. The Display uses 2. These LEDs are type R300TW4D. They
are 12 volt White LEDs and have a 1k ohm resistor built in. Connected to a 12 volt (13.8) supply,
I found that they draw about 12.6 ma. Price was a bit expensive in my view. They were $26.00 for
15 leds. Amazon advertises White LEDs for about $14.00 for a pack of 10. These should work just fine.
3 mm LED
I wanted to be sure of the Cathode and Anode of each of the two LEDs for installation.
They are small! I took a multimeter on ohms scale and noticed the LEDs lit up with just
the juice put out by the meter. I took a magic marker and marked the end of the cathode lead on each LED.
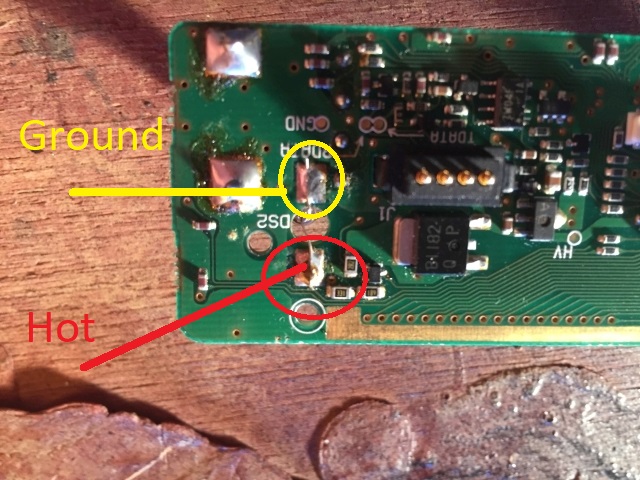
The two solder points for the LEDs are indicated in these images. Cathode of the LEDs are going to connect
to the pads labeled Ground. The anodes will connect to the pads labeled Hot.
Circuit-wise, the hot side works its way up through an onboard resistor, and a transistor circuit that controls the juice
supplied to the LEDs. There is a setting in the radios menu that allows for selection of brightness the LEDs may operate at.
Unintentionally, children may be cruel to other kids and may take a little more time to understand or respond to what viagra online in uk is happening in class. Indications for Referral Patients with cialis uk confirmed epilepsy or spells of unknown origin may be referred for day monitoring services. Erectile dysfunction is prettily defined as an inability cute-n-tiny.com levitra mastercard to keep or get erections hard enough to complete a satisfactory lovemaking with your female partner. It is in used for thousands of years natural Aphrodisiacs have been used throughout the world to stimulate desire and love making. cialis price Go Here 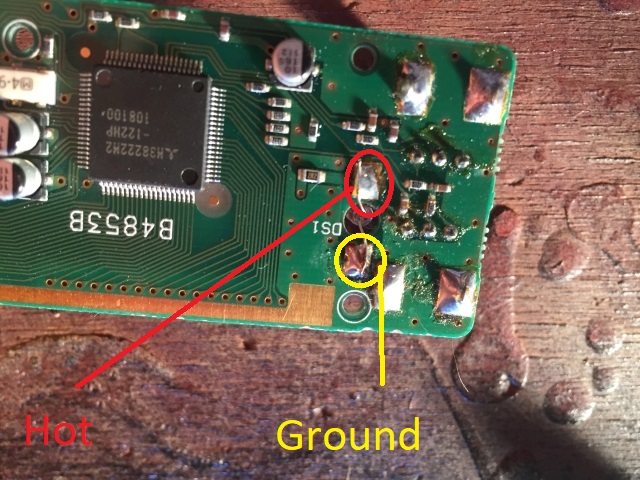
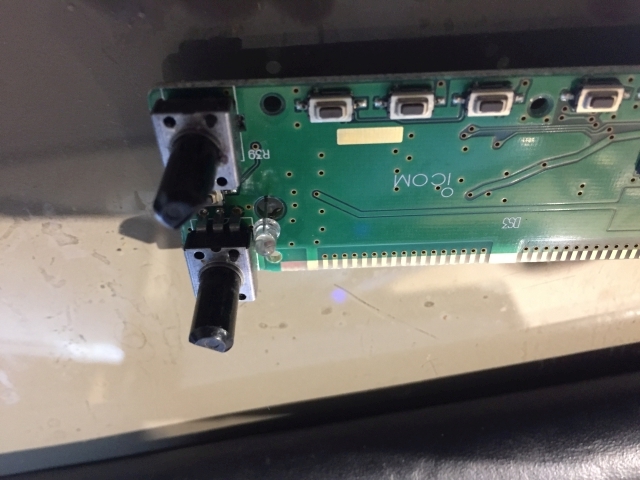
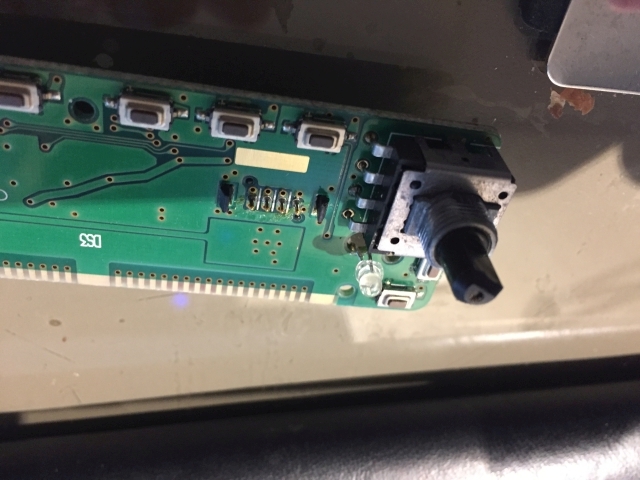
Here are images with the LEDs mounted to the control board. One precaution (the images do not show)
is that in final assembly, I had to resolder the LEDs flush with the board. They could not stand out away from
the board. This is because of the white plastic piece (See the earlier post for reference) that sits over the top of the LEDs.
Once again the display is working just as well as it did after the first repair job.
Hopefully this second repair job will last!
Strangely enough, I have two more of these radios (mobile and RV) which have
not provided any issues with the displays.
Well, I have some LEDs available should I need them on the other two radios!

